I had a busy day yesterday


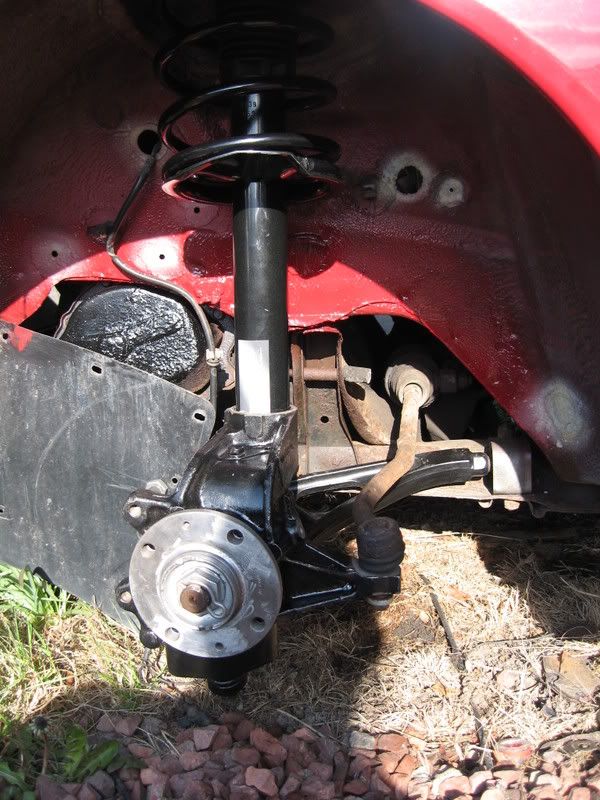
Got the suspension turrets all waxoyled and then got it all fitted back on. Looks great I think.
Also took this lot


And fitted it back on. Took this lot off last week when I removed the timing belt. Got the belt back on yesterday and the engine is timed. I way even get to start it today .....
Fingers crossed.
Today's jobs are start it, fit the front brakes and remove the rear brake slider that is seized on.
Posted 20 April 2008 - 10:03 PM
It Runs !!!!!!!
I am very happy today as I tried a start and it ran. Runs reasonably well for a car that has been off the road for 7 years!!!
Today got the brakes rebuilt on the drivers side, wheels on all round, removed rear calliper slider, replaced alternator and tried a start. Needed to put fuel in it. And almost dropped the car with no wheels on! Jacking the car up on grass is not fun
Still, I moved it today, albeit only a few feet back and forward. Cant move it far without brakes!!
Went to put the calliper on the passenger side and I realised that I have misplaced it. Oops! Think they might be at work.
So next job is brakes. Need to get them rebuilt all round and bled so I can move the thing from the grass to the driveway again.
After that its rear hub replacement and ABS fixing time.
Interestingly whilst I was under the back I saw more rust than I have ever saw on a 405. Will have to get a good look at that later on and sort it out.
Posted 27 April 2008 - 07:40 PM
Nice sunny weekend and I am on night shift testing the generator. It figures.
Still, I got some done today. Not found the missing callipers yet though.
Today I replaced some perished fuel hose. The old one was leaking when the car was running right onto the exhaust manifold


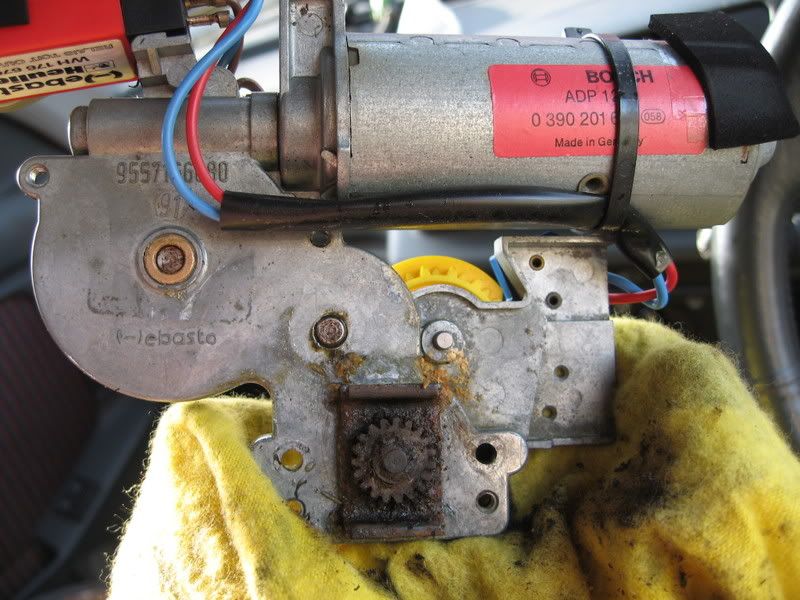
Also had a go at fixing the sunroof. This is going to need further work and possibly full replacement. Currently taped shut !!


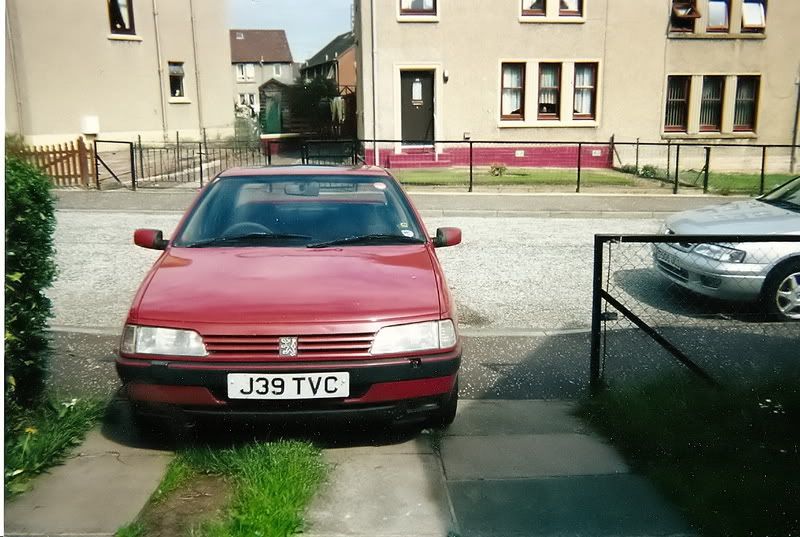
Found some old pics of the car when it was on the road. I wonder if I can make it this nice again.


Posted 03 May 2008 - 10:12 PM
I had a semi productive day today. Spend a fair bit of it looking for those callipers I have lost. No luck there unfortunately. Its annoying as the brakes are the only thing stopping me moving the thing. Sods law dictates that I will get some from a scrappy and then I shall find my ones. Grr
Anyway, disappointed by my own memory (seeing how I have put these callipers somewhere and forgot) I decided to do something productive and prepare the car for the sunroof replacement.
Removal of the sunroof requires removal of the headlining so I started here. Pretty easy to do actually.
Started by removing the front pillar covers. These more or less just pull off.

Next I removed the rear pillar covers. Again just pull them off.

Next I removed the centre pillar covers. These are a bit more tricky. First you need to undo the holding screws at the top and bottom and then pull off the knob for moving the seatbelt height. This takes a good hard tug but will come off. Then remove the seatbelt and pull the cover off.
There are couple of wee bits to do now, front and rear compartment lights, jacket hooks etc.
Then the headlining should just pull down. Mine was held up by Velcro but yours may have glue so watch for this.
On inspection the headlining has some light damage. The fabric is hanging down a bit and the foam material it is made from is perishing in places it appears. Will need to repair this lot before I put it back together.


Once this is removed you can get access to the sunroof assembly. I did not remove this as it will leave me with a big hole in the sunroof. This can be done another day when I have the new sunroof.
Spent the rest of the day faffing with my 406. ABS is not working. The garage said its a faulty wiring loom and wanted £760 to replace it !!
Hope I get good weather tomorrow.


